Our garden boxes are amazing - all 6 of them. Each box is 6x3 which gave us a lot of gardening real estate, but we managed to use all of it and are contemplating eventually adding 2 more boxes. We could have made larger boxes but Clint read that if you get much larger than 6x3 you have to start adding support in the middle of the box because of the weight of the dirt, and that was extra work we didn't feel like worrying about.
Here's a sneak peak at the finished boxes:

Don't they look great?!? I've really gotta hand it to Clint - he did all of the research on making good garden boxes and did a majority of the work with help from me and his dad. He found this great blog tutorial on making garden boxes on sloped ground: http://eartheasy.com/blog/2010/04/how-to-build-a-raised-garden-bed-on-sloping-uneven-ground/ But if you don't feel like going there, feel free to read on about how to make them.
I can't tell how evident it is in the picture - but our yard slopes downward and toward the neighbor's house, so we had a lot of slope to work with. I didn't even really realize how *much* the yard sloped until we were putting in these garden boxes and wanted to level them. Fortunately it worked out really well and now we have these cute tiered garden boxes!
How to make the boxes:
1. Have the right tools:
Make sure you have a circular saw to cut the wood - there is a lot of cutting involved and you would not want to do it by hand. You'll also need 4 L-shaped brackets per box, a ton of 2.5" screws and a power drill.
2. Choosing the wood:
Clint read that cedar was the best because it repels bugs and lasts a long time outdoors even without treatment, but we couldn't find any cedar wood. Or maybe it was absurdly expensive. So after some debate, we decided to go with pressure treated wood, but lined the boxes with plastic cover to prevent the chemicals in the pressure treated wood from seeping into our soil. (Apparently the chemicals they put in it aren't supposed to be that bad for you anymore, but we figured better safe than sorry.) You'll need a LOT of wood. For each 6x3 box you'll need at least 18' for the frame, and up to 18' for the side boards, and ~3-6 more for the level supports depending on the slope of your ground. Plan on purchasing ~40-42 feet of lumber per box. The more boxes you make, the more likely you are able to reuse some of the cut wood for the sideboards, so the amount of wood per box gets reduced.
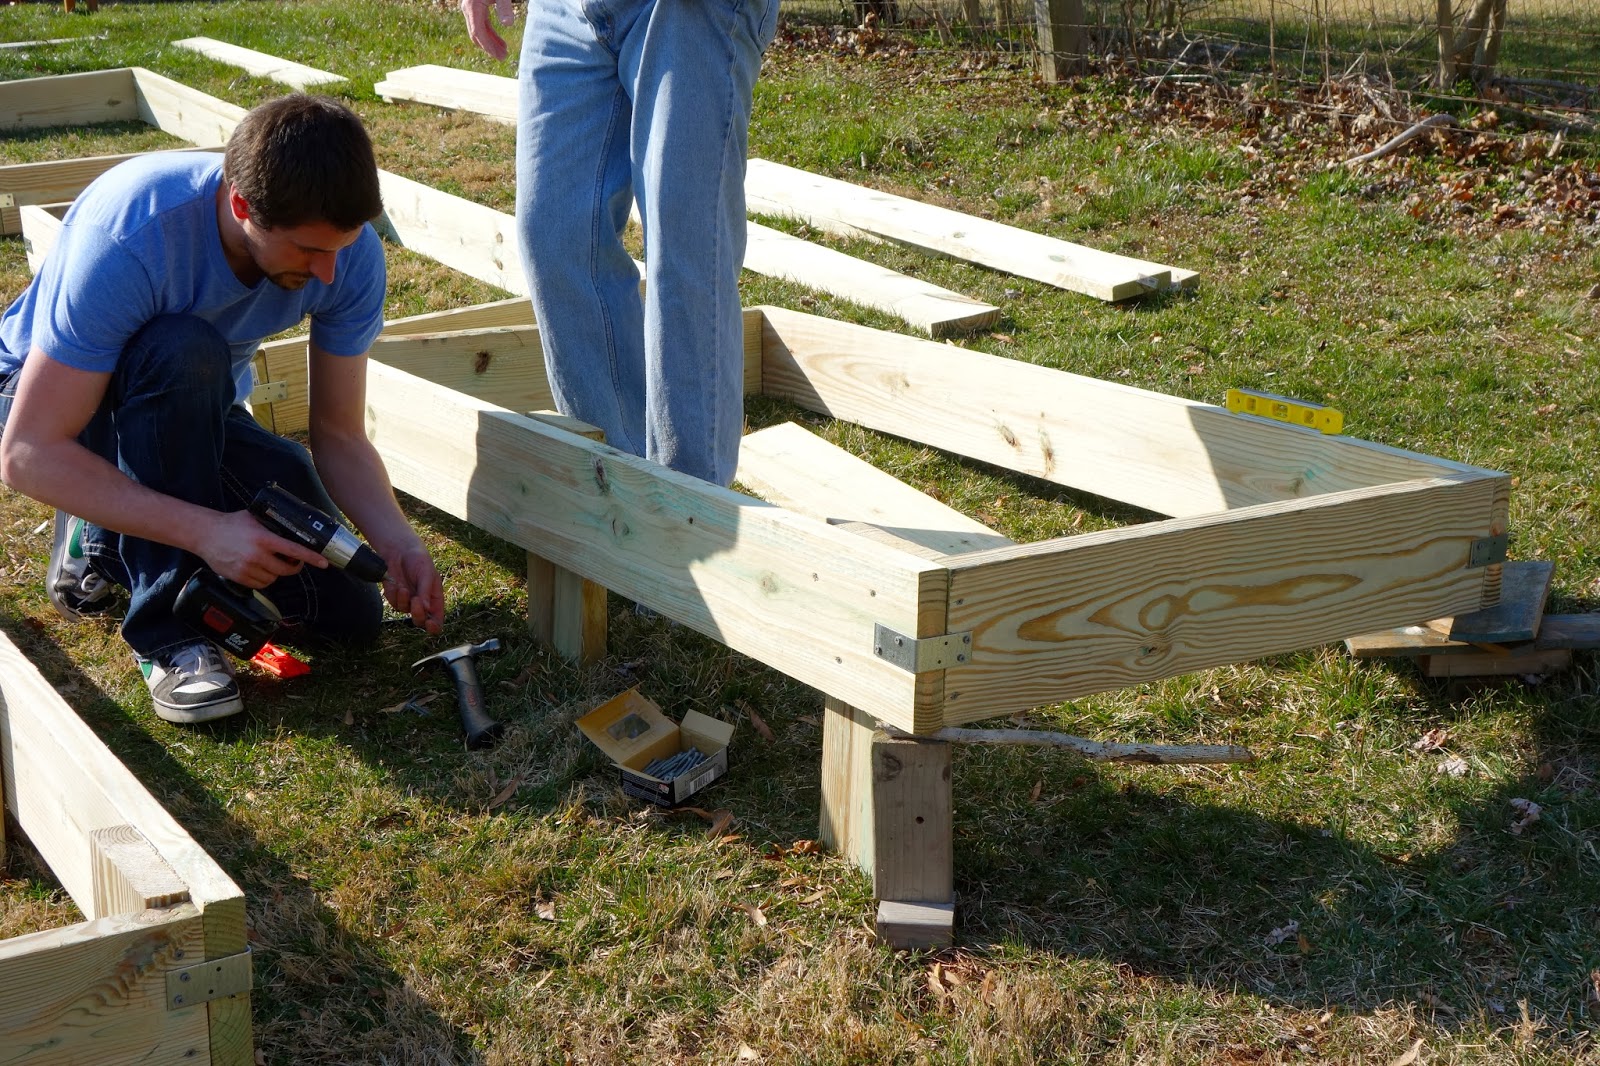
3. Framing the boxes:
For the initial box frame, we opted for 2x6s and used 6ft planks. We used 3 6ft boards per box - cutting one in half for the short sides. To make the frame, use a single L shaped bracket at each corner to shape the boxes into long rectangles and place them on the ground where you want them.
One thing to note - since our ground isn't level, most of our boxes are well deeper than 6" post-leveling, but each box does have one corner/side that is only about 6" deep. If you want your shortest corner/side to be deeper than 6" you could go with 2x8s or 2x10s for your frame.

4. Leveling the boxes:
After making the frame of each box, the next step is to level. In order to level the boxes, work on one box at a time and level it specific to the ground below it. This does mean that you can't move the box after you level it (unless the spot you're moving it to is exactly the same pitch/slope).
Level the boxes by adjusting the 3 low corners of the box to the tallest corner. Prop each low corner up with varying heights of scrap wood/items until all 4 sides of the box are level.

When level is achieved, make 'leveling' support stands at each corner of the box and the middles of the long sides. To do that, place one of the extra 2x6s into the ground vertically and against the inside of the box. Kind of shove it into the ground so that it's perpendicular to the box top and leaves an imprint in the ground. Then draw a line on this 2x6 along the top of the box frame, as a guide for cutting. After cutting that stand to size, return to the frame and screw the stand into the inside of the frame, using your imprint for placement. Start in the middle (where you don't have external supports you can knock out of place) and then work on the 4 corners. On the corners, screw both sides of your box into the corner stands. Even though one corner is sitting on the ground, make a stand for it anyways as it provides extra strength and support for the box.
5. Making the sides of the boxes:
After the boxes are all leveled with your support stands, you have to make sides for the boxes. For four of our boxes the 2x6's we had were tall enough to fill the gap between the box frame and the ground. However 2 of our boxes were on such a slope that we bought 2x8s (maybe 2x10s?) so that we could make the side out of a single layer of wood instead of two.
To make the sides, you'll place your side board on the ground along the length of the side you want to fill, right up next to the frame of the box. (I should have taken a picture of this, because that was a terrible explanation). Then you can trace the bottom of the box frame (from the inside) to draw a line against your side board for cutting. You will have to skip the spaces where your support stands are in the way, but you can fill them in with a straight edge afterward.
After making your cut, your wood should fit pretty perfectly between the leveled frame and the ground. We put the cut side on the ground for aesthetic reasons. Then you can screw the sideboard to your support stands. Voila!

| 
|

6. Line the boxes:
If you went with pressure treated wood, your last construction step would be to line the boxes with plastic if you're concerned about the chemicals. Our plastic started to rip by the end of the summer, so I'd recommend a thick plastic as opposed to a thin one. I think we used about 3mil plastic. Unfortunately I can't make a recommendation on thickness as ours tore, but if we make more boxes I'll update the post to reflect what we chose.
The finished product:
 |
| We added little stakes to use for bird netting, in case small animals were a problem. |
And a cute picture of our helper Bizzy. Can't forget her!


Nice blog thanks for postting
ReplyDelete